Category Archives: Christmas

Christmas Wrapping

Standard

I don’t know about you, but I am not in love with wrapping Christmas presents.  Wrestling acres of paper and finding the often invisible end of the sticky tape annoys me greatly.  Don’t get me wrong, there is nothing I love more than the look of nicely wrapped presents below the Christmas tree, but because wrapping seems like such a chore, my gifts often lack the wrapped prettiness that I appreciate so much on others’ gifts to me.

This year I have decided to put a little more thought into gift wrapping.  I have come up with a theme, nothing too fancy or difficult, because my aim is to not become too flustered with the wrapping but to still love the look of my finished gifts.

Christmas Wrapping

I chose textured brown paper for my wrapping this year.  At risk of sounding like a bad presenter on Better Homes and Gardens, I am in love with this organic look. I was going to tie each present with some simple brown twine but the boys convinced me to go with ‘fancy’ red and white twine.

 044

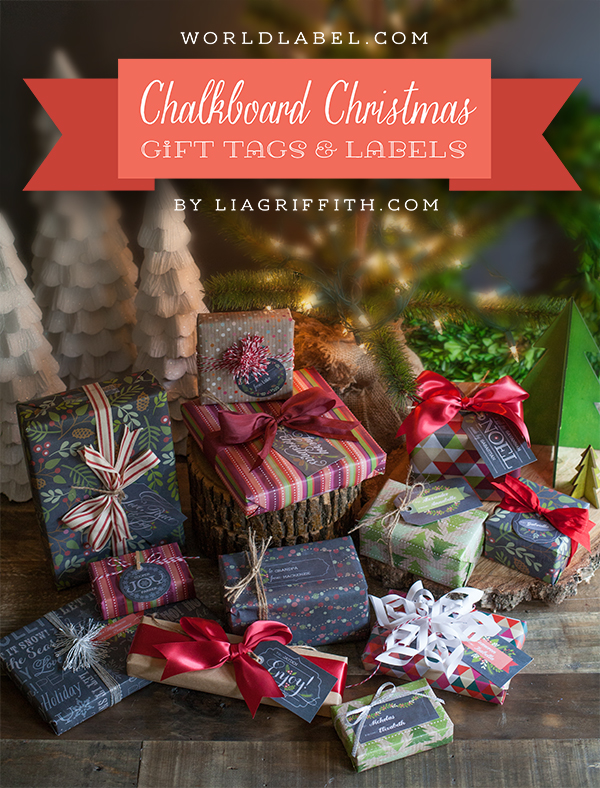
To keep things feeling rustic, I found some chalkboard gift tags online and printed these off on card. There are a heap of free printable chalkboard Christmas gift tags online if you wanted to get some for yourself. Take a look here and here for some cute ones. For the adults I used real Chalkboard tags I picked up from a variety store.

Christmas Wrapping

So in less time than it has ever taken me before, I wrapped all my Christmas presents. While I am no master wrapper, they look good under the tree because they match….no higgledy piggledy looking display this year!

Christmas Wrapping

 Do you have a Christmas wrapping theme?

Festive Food: White Chocolate and Macadamia Rocky Road

Standard

I am a sucker for white chocolate, so this festive rocky road is a must make at Christmas.  This always gets gobbled up at any party.

White Chocolate and Macadamia Rocky Road

Ingredients

250 grams marshmallows, halved

100 grams dried cranberries

100 grams macadamias, roughly chopped

60 grams pistachios (optional – but highly recommend)

35 grams desiccated coconut

360 grams good-quality white chocolate


Method

1. Line a 20 cm square cake pan with baking paper, allowing some overhang on the sides

2. Lightly toast the nuts in a pan on the stove

3. Combine the toasted nuts, marshmallows, coconut and cranberries in a bowl

4. Melt the white chocolate. You can do this over a water bath or in a medium-high microwave for 1-2 minutes, stopping every 30 seconds to stir.

5. Pour the chocolate over the marshmallow mixture and stir well.

6. Spoon the rocky road mix into your prepared tin and chill for 2 hours before cutting into squares with a warm knife.

White Chocolate and Macadamia Rocky Road

There are a few other things that I love to make at Christmas time. I hope to share these with your soon.

Have a great weekend.


The Softest Playdough and Printable Playdough Fun

Standard

I started my Christmas holidays today and have been craving some Mummy and sons time, so I thought we would do some fun play.  As it is terribly overcast and humid here in Brisbane, we opted for some indoor fun in the air-conditioning.

'Just think...summer's coming, and  everyday will be like Saturday morning!'

Both my boys love playdough.  Recently I saw a recipe for the easiest, softest, most beautifully smelling playdough.  It only has 2 ingredients, one of which you would never guess, and takes only a few minutes to make. You must give it a go….

Soft Playdough

Mix 2 parts cornflour (corn starch) to 1 part hair conditioner.

Knead until it comes together in a soft dough. At this point you can colour it with food dye.

Play!

Soft Playdough Recipe and Playdough Printables

It really is that simple.  I picked up a cheap conditioner at the shops that had a lovely smell and pink colour, so I didn’t have to dye the dough myself. Obviously, this isn’t a playdough for little ones who might be tempted to taste their dough creations.

The boys have spent the morning playing with this as well as some free playdough printables I found on the net.  I printed and laminated them so they will survive the holiday season.

Soft Playdough Recipe and Playdough Printables

You can find these playdough mats at Tot Schooling .  Another place to look is Busy Little Bugs.

Soft Playdough Recipe and Playdough Printables


The Playdough puppets are found at the Nuture Store.

What a lovely, simple activity for us to start the Christmas holidays with.


Great Festive Cookie Recipe

Standard

The other day I headed to the shops in an effort to finish all of my Christmas shopping.  The whole expedition went wonderfully.  I was focused, determined and fuelled by coffee. Well maybe I wasn’t 100% focused, because this little unplanned, but severely cute item, jumped into my trolley.Christmas Cookies

I mean with all the festive cooking that goes on around here, how could I not have a cute Christmas mug and snack plate?

One little festive treat I whipped up to enjoy on my new plate is this super easy and tasty cookie.

The recipe is not new. Last year I posted about the Cookie Jars that I gave to friends and neighbours. You can read about them here.

Christmas Gifts in a Jar

We so enjoyed these, I have baked them several times throughout the year.  But, now that the green and red m&ms are back, I had to make these cookies – Christmas style.

Christmas Cookies

Ingredients**

  • 1  1/3 cup Plain Flour
  • 1 tsp baking soda
  • 1 tsp baking powder
  • 1/4 tsp salt
  • 1 cup oats
  • 1 cup christmas m&ms
  • 3/4 cup chocolate chips
  • 1/2 cup brown sugar
  • 1/2 cup castor sugar
  • 1/2 cup coconut
  • 1 egg
  • 1/2 cup butter (room temp)
  • 1 tsp vanilla extract

Method

  • Preheat oven to 180 deg Celsius (160 deg celsius – fan forced)
  • Place all of the dry ingredients in a bowl and combine
  • Add egg, butter and vanilla and mix until the ingredients come together
  • Roll heaped tablespoons into balls and place on a lined cookie tray
  • Bake 10-12 minutes

**These measurements are Australia metric. 1 cup = 250 mls, 1 tsp = 5 mls

Christmas cookies

Now it is time to sit back and enjoy one of these while my boys sleep off an active morning at the park. Yum!


Star Biscuit Christmas Tree

Standard

I don’t know about you, but the Christmas invitations are coming in thick and fast.  While they are lots of fun, it can be hard to think of food that is special, and a little bit different, to take along and share. For one party this week, the boys and I made this Star Biscuit (Cookie) Christmas Tree. The whole thing didn’t take that long to make – with my little short cuts – was lots of fun and looked really effective.

My secret to making this whole project easy was using pre-made gingerbread biscuit dough.  I bought mine from the freezer section of Ikea.

Star Biscuit Christmas Tree

Another short cut was using this Christmas Tree Kit that I picked up for a few dollars a few years back at Kmart.

Star Biscuit Christmas Tree

The kit comes with different sized star cookie cutters and the little wooden stand to place the biscuits on.  This made the whole thing easy to do, but of course it is not essential should you wish to give this a go yourself.  You could print different sized stars on cardboard and use these as a template to cut the dough.  Then just stack the biscuit on top of one another, using some icing to keep things from toppling.

We found the Ikea dough to be easy to roll and cut.  It baked with little spreading – perfect for our project.  We rolled the dough extra thin so the biscuits would be crisp and we weren’t disappointed. They were delicious! It was lucky we even ended up with enough left over after taste testing to even make a Christmas tree! Star Biscuit Christmas Tree

After stacking the biscuits on the stand there was some debate about how best to decorate the tree.  We could have used icing or just a simple dusting of icing sugar, but my 5-year-old was adamant that a drizzle of melted white chocolate and some sprinkles was the way to go.Star Biscuit Christmas Tree

So in no time the tree was decorated and ready to take to the party.  It looked like it took a lot of effort but it was quick and easy. Any fiddly bits of the project were overshadowed by the fun we had when making it.

This will no doubt make an appearance again, but only after a trip back to Ikea to stock up on the delicious gingerbread dough!

DIY Christmas Pocket Book

Standard

In the hope of avoiding  the shopping centre crush at Christmas time, I have well and truly begun my Christmas shopping.

In years past, my present buying had been a bit haphazard. This year I was determined to be organised by writing a list of gift ideas and items purchased, as well as keeping my receipts in one place.

I decided I needed a pocket book in which to keep this information. Instead of going out to buy one, I made one using left over craft paper from last Christmas.

The whole thing was really simple and quick to make.

I didn’t have any double-sided paper left, so I stuck some coordinated prints together to make three,  30 x 30 cm double-sided pieces of paper. If you wanted to do this,  you could use paper or light card and alter the size and number of  sheets to suit the size pocket book you need.

I folded the base of each sheet to make a little pocket.DIY Christmas Pocket Book


I held down and secured the sides of the pockets with a glue tape.

DIY Christmas Pocket Book

I folded each sheet of paper in half, using a ruler to get the folds crisp.

DIY Christmas Pocket Book

I stacked the pockets on top of each other and used the sewing machine to bind them together along the fold line.

DIY Christmas Pocket Book

This configuration of folded sheets gave me a good number of pockets to place receipts or vouchers and some blank pages on which to write my Christmas present ideas.

DIY Christmas Pocket Book

I have divided each spread up for the different individuals or groups/families I buy gifts for.

DIY Christmas Pocket Book

The front cover was screaming out for a little prettiness so my youngest helped me glue some buttons in a wreath shape on the front.DIY Christmas Pocket Book

This little book now lives in my handbag. I am never without my ideas list at the shops and my receipts can be stowed safely inside straight away.

How do you keep your Christmas buying organised?


Christmas Giving: Gifts in a Jar

Standard

I love the idea of giving people homemade gifts in a jar for Christmas.  I think they are more thoughtful and a lot nicer than the often given box of chocolates or tin of biscuits.  Over the years I have made bath salts, soaps, preserves, flavoured nuts and baking mixes like brownies and biscuits.

Recently, I saw this recipe for Christmas Cookies in a Jar on The Larson Lingo and The Organised Housewife.  They looked gorgeous with their festive MM layer.  I had to make some for myself.

Christmas Gifts in a Jar

I picked up the jars at Kmart, the Christmas MMs at Coles and printed my own labels on sticker sheets.

If you want to have a go yourself, The Larson Lingo has free printable labels for your jars or you can buy labels from The Organised Housewife.

If cookies aren’t your thing, you will find heaps of other sites out there with ideas and printable labels.  Here are some of my favourites …….

Cul-de-sac Cool has 5 different ideas with labels including pumpkin cranberry bread and toffee blondie bars

Squawkfox has heaps of ideas including soups in a jar.

Organized Christmas lots of ideas, and not just for food

Skip to My Lou has a few gift jar recipes.  I am loving the sound of injecting more candy canes into the Christmas season with peppermint brownies

I hope you enjoy the crazy last days before Christmas.

Christmas Craft: Salt Dough Santa Handprints

Standard

Yesterday, I shared with you the Snowmen families we made out of the kids’ handprints.  You can read about them here.

In keeping with the handprint theme we also imprinted and decorated some salt dough.

Christmas Craft: Salt Dough Santa Handprint

I had seen these Santa ornaments about the place, loved them, but thought they looked like a bit of work.  Surprisingly, the salt dough is really easy to make and cheap!  The decorating didn’t take long and was a lot of fun. So if you want an easy, budget-friendly christmas craft to complete with the kids, give this a whirl.

Salt Dough

Ingredients

1/2 cup salt

1/2 cup flour

1/4 water (give or take)

(These measurements allowed me to make two thick handprints, with a little dough left over)

Method

Knead ingredients together until dough a forms.

How to make your Santa Ornament

1. Roll the dough out and press your child’s hand into the dough.  With a sharp knife, cut around the imprint, leaving a small border.  Using a skewer or the tip of the pencil, make a small hole at the base of the handprint so that it can be hung once it is baked.

2. Place the ornaments into a 90 degrees celsius oven and bake for 3 hours

Christmas Craft: Salt Dough Santa Handprint

Baked Salt Dough Handprint

3. When cooled, paint the whole ornament white. Using some red and pink paint and a black marker, fill in the features of Santa’s face, beard and hat.  Use mine as a guide or make your own creation.

Christmas Craft: Salt Dough Santa Handprint

I think they look so cute!

We are going to make another batch of salt dough this weekend and use Christmas cookie cutters to make some more ornaments. My 4-year-old is going to love it!


Christmas Craft: Handprint Snowman Family

Standard

I regularly take imprints of my boys’ hands.  I love looking back at those paint-splodged reminders of their pudgy little fingers.  So cute!

Our latest handprint has been given the Christmas treatment.

Christmas Craft: Handprint Snowman Family

You have probably seen these about the place.  I think they are just to precious for words.

To make these handprints extra special, I purchased some small blank canvas which I painted a background colour.

Christmas Craft: Handprint Snowman Family


A white hand print, some snow blobs and a bit of texta work later, the snowman family was complete.

Christmas Craft: Handprint Snowman Family

These are great as Christmas gifts for the family.  The ones I have kept for myself, I have attached magnets to and hung them on the fridge.  I hope to do a series of these over the years.  They will be a great visual reminder of how they have grown.


Christmas Giving: Reindeer Noses

Standard

You have probably seen this idea about the traps.  It is just so adorable.  Reindeer noses.

Reindeer Noses

It is a great small treat to give the kiddos in your life, and the perfect present for kids to take to school for their classmates.

All you need to do is pop a bunch of candy in a cellophane bag and stick on a label.  I have seen these done with chocolate beanies/smarties/MMs, jelly beans or with round chocolates like malt balls.

In each packet, I popped in 8 Maltesers – one for each of Santa’s reindeer.  I tried my best to get a hold of some jaffas so I could throw in Rudolf’s  nose, but I had no luck.

There are quite a few tech savvy bloggers out there who have created beautiful labels for your reindeer noses.  Some of my favourites can be found in the following places…..

Beautifully Organised (This is where I got my labels)

Craftaphile

Mum of All Trades

Visual Meringue

Reindeer Noses